
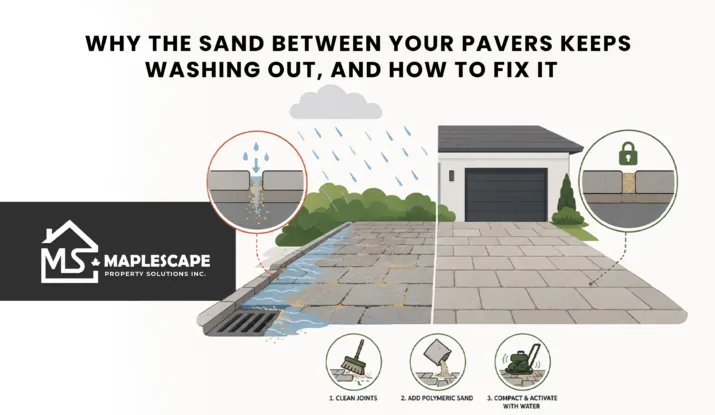
The joints between the interlock can look decorative. They are not. Joint sand helps neighboring pavers work together rather than behave like separate blocks.
For homeowners thinking about outdoor property maintenance, missing sand can be an early warning sign. As joints empty, weeds find easier places to establish, and movement becomes easier to see.
The good news is that joint-sand maintenance is often straightforward when the pavement underneath is still stable.
1. What Does Joint Sand Actually Do?
Interlocking concrete pavement depends on several forms of interlock. CMHA explains that vertical interlock is created through shear transfer between neighbouring units through sand in the joints. The pavers, joint material and edge restraints therefore work as a system rather than as isolated stones.
That is why full joints matter even on pedestrian patios.
Joint sand should not be confused with bedding sand. Bedding sand forms the thin layer beneath the pavers; joint sand fills the vertical spaces between units and contributes to interlock.
When the pavement is installed, pavers are compacted into the bedding layer and sand is swept into the joints. Compaction and complete joint filling help tighten the surface. CMHA specifications call for the joints to be filled after compaction rather than left partly empty.
Joint sand helps limit movement at paver edges. Edge restraints provide lateral support that keeps the field from spreading.
2. What Happens When the Sand Starts Disappearing?
Sand loss normally develops gradually. Weather, runoff, traffic, cleaning and movement can all reduce the level inside the joints.
CMHA recommends topping up joint sand when it has dropped more than 12 mm, or about half an inch, below the paver surface.
A few clues are worth watching:
- Deep-looking joints: the sand sits noticeably below the paver edges.
- Loose surface units: individual blocks begin to move or rotate.
- Widening perimeter joints: edge restraint may be losing control.
- Recurring washout: water may be travelling through the same route.
- Weeds and ants: open joints create easier places for seeds and insects to establish.
- Uneven pavers: settlement may be occurring beneath the surface.
The important point is not to blame every symptom on missing sand. Joint loss can be a maintenance issue, but it can also be evidence of drainage, edge or base failure.
3. Is Polymeric Sand Better Than Regular Jointing Sand?
Polymeric sand contains binders that create a more stabilized joint than loose conventional sand. Stabilized joints can reduce sand loss and resist weeds and insects. CMHA recognizes stabilized joint sand as one way to reduce joint-sand loss.
That does not make polymeric sand the automatic answer for every pavement.
For existing pavers, CMHA says topping up joints with polymeric sand is not recommended. A proper stabilized-sand renewal may require removing enough existing material for the replacement system to perform correctly.
Permeable interlocking pavement is another exception. CMHA advises against polymeric sand in permeable systems because the joints are designed to allow water infiltration.
For polymeric sand Toronto projects, identify the pavement type and existing joint condition before selecting the material.
4. Why Does Joint Sand Wash Out in the First Place?
Replacing sand without understanding why it disappeared can create a maintenance loop.
4.1 Concentrated Water Flow
CMHA warns that channelized water can wash sand from joints and weaken the pavement. Downspouts, roof runoff and drainage routes should therefore be considered when the same joints repeatedly empty.
4.2 Aggressive Pressure Washing
A pressure washer can remove grime, but a narrow high-pressure stream can also blast joint material out. CMHA recommends lower pressure and a wider spray pattern when cleaning pavers.
4.3 Weak Edge Restraint
When the perimeter spreads, joints can widen and sand loss becomes easier. CMHA describes widening outer joints, paver rotation and edge settlement as signs of lost lateral restraint.
4.4 Underlying Settlement
If pavers drop or rotate because the base or bedding layer has moved, simply adding sand between them will not restore the surface geometry. The settled area needs to be diagnosed first.
5. What Does Proper Re-Sanding Actually Involve?
For conventional loose joint sand, CMHA’s maintenance guidance is practical: remove surface debris, work on a dry pavement, sweep suitable dry sand back and forth until the joints fill to the bottom of the paver chamfers, then remove excess material.
New construction uses compaction to work sand into the joints. On larger maintenance areas, filling and compaction matter because apparently full joints can settle deeper.
Polymeric or other stabilized products have additional preparation, filling, cleaning, activation and curing requirements that vary by manufacturer. Follow the selected system rather than treating every bag of jointing material the same.
Most importantly, re-sanding should happen after loose pavers, failed edges, washout paths and low areas have been addressed.
6. When Is Re-Sanding Not Enough?
Re-sanding is maintenance. It is not a substitute for repairing a failing pavement structure.
Pause before adding more material when:
- pavers rock underfoot;
- joints keep reopening after previous work;
- edges are spreading outward;
- a section has sunk or heaved;
- water consistently runs through the joints;
- bedding or base material appears to be escaping;
- several pavers have changed elevation.
CMHA’s maintenance guidance connects loss of lateral restraint with widening joints, rotation and settlement, and recommends repairing the restraint and adjacent pavement before refilling joints.
This is where outdoor property maintenance becomes diagnostic. If a walkway needs joint sand but also has low spots or failing edges, handling those conditions together is more sensible than repeatedly sweeping sand into a moving surface.
Maple Scape lists pathway repairs within its GTA outdoor maintenance offering, so this type of combined assessment can fit naturally when joint loss appears alongside uneven or damaged interlock.
7. Why This Small Maintenance Detail Matters
Joint sand is easy to overlook because most of it sits below the surface.
Yet it contributes to interlock, supports load transfer, and works with edge restraints to keep the pavement behaving as one field. Full joints also make weed and ant establishment harder.
The useful habit is simple: inspect the joints when you clean the patio, walkway, or driveway. If they are low, find out why before automatically refilling them.
Frequently Asked Questions
How do I know when paver joints need more sand?
If joint sand has fallen more than about 12 mm below the paver surface, CMHA recommends topping it up.
Does joint sand actually stop pavers from moving?
It helps. Joint sand transfers shear between neighboring pavers, while edge restraints and the underlying pavement layers provide other parts of the interlock system.
Does polymeric sand prevent all weeds?
No. Stabilized joints can resist weed establishment, but windblown seeds can still grow where debris and organic matter collect.
Can I pressure wash pavers before re-sanding?
Yes, carefully. Use lower pressure and a wider spray pattern so cleaning does not unnecessarily remove joint sand or damage paver surfaces.
Why does the sand keep washing out of the same joints?
Repeated loss can point to concentrated runoff, widening joints, edge-restraint failure or pavement movement. Correct the cause before repeatedly replacing sand.